
Here's some surf vibe, good for the soul!
http://surfermag.com/av/flash/ukulele_virtuoso_jake_shimabukuro
Wednesday, April 15, 2009

Monday, April 13, 2009
Tuesday, April 7, 2009
Installing AutoCAD 2010
Below is a step-by-step preview on how to install AutoCAD 2010.
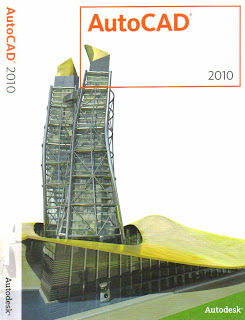 AutoCAD 2010 CD case cover.
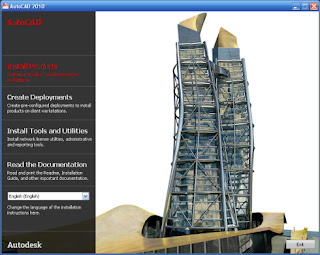 Select Install Products.
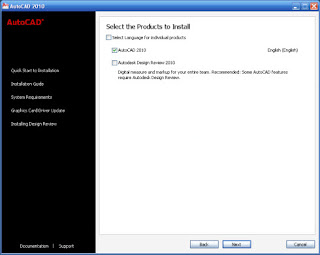 Select which products you wish to install.
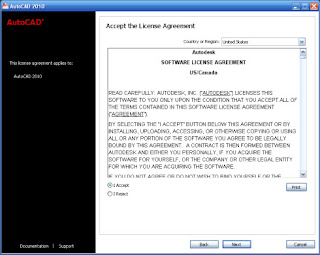 Read the complete agreement always!! ;) and then select Agree.
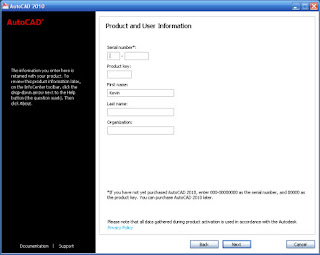 Fill in your information, serial number, and product key. You will find these listed on the back of your AutoCAD CD case.
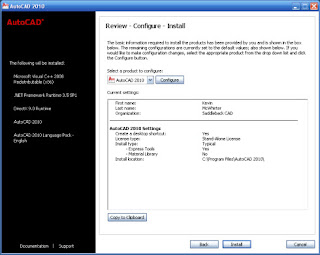 Review your information, configure if needed, then select Install.
 If you have made no changes to the default configuration, you will get this message dialog. Select Yes if you're ready to continue.
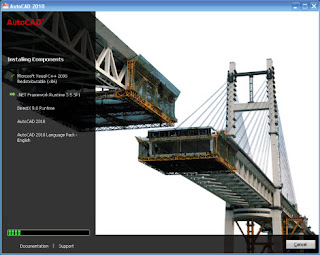 Installing the compoents will now start. The time this takes will vary with your computer system.
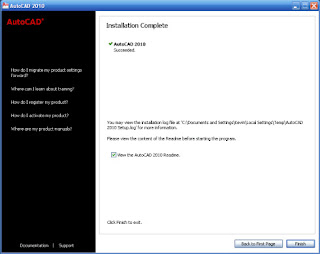 Once the installation is complete, this dialog will appear and you can select Finish.
 The install will place this shortcut for AutoCAD 2010 on your desktop.
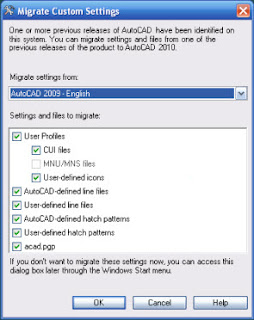 You will be asked to migrate settings from previous versions of AutoCAD that have been detected on your computer.
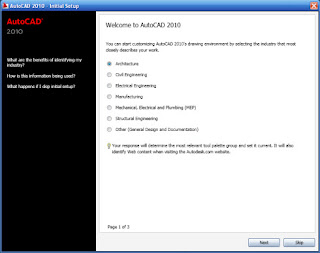 This dialog let's you set your industry standard settings as default.
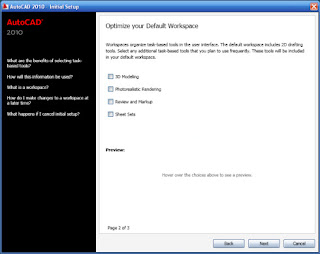 Here you can opitmize your settings for the type of work you do.
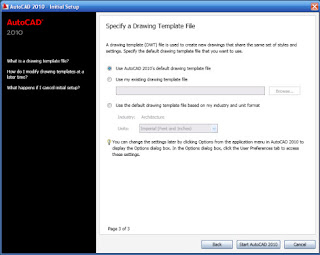 Here you can accept the default drawing template, or use a custom one.
 You have the option to activate now, or within 30 days. It takes less than a minute to get the activation code if you're online.
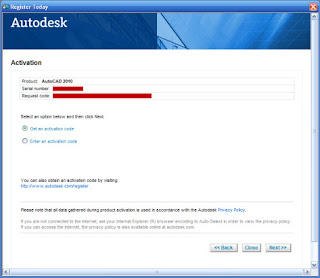 Enter your activation code information. You will then be asked to restart your computer for the new settings to take place.
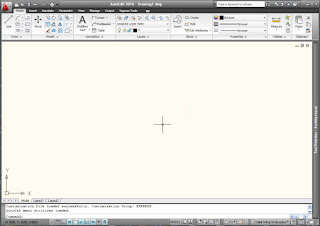 Above is the new AutoCAD 2010 screen menu with no changes from the default settings.
 AutoCAD 2010 CD case cover.
  Select Install Products.
 Select which products you wish to install.
 Read the complete agreement always!! ;) and then select Agree.
 Fill in your information, serial number, and product key. You will find these listed on the back of your AutoCAD CD case.
 Review your information, configure if needed, then select Install.
 If you have made no changes to the default configuration, you will get this message dialog. Select Yes if you're ready to continue.
 Installing the compoents will now start. The time this takes will vary with your computer system.
 Once the installation is complete, this dialog will appear and you can select Finish.
 The install will place this shortcut for AutoCAD 2010 on your desktop.
 You will be asked to migrate settings from previous versions of AutoCAD that have been detected on your computer.
 This dialog let's you set your industry standard settings as default.
 Here you can opitmize your settings for the type of work you do.
 Here you can accept the default drawing template, or use a custom one.
 You have the option to activate now, or within 30 days. It takes less than a minute to get the activation code if you're online.
 Enter your activation code information. You will then be asked to restart your computer for the new settings to take place.
 Above is the new AutoCAD 2010 screen menu with no changes from the default settings.
Enjoy!!
Monday, March 23, 2009
Autodesk Users Group International
If you're looking for a great reference for industry updates, AutoCAD news and tutorials, check the AUGI website!
http://www.augi.com/home/default.asp
http://www.augi.com/home/default.asp
Wednesday, February 11, 2009
ArchBlocks Web Site Updates
I just wanted to let everyone know that I have been working on updating the www.ArchBlocks.com website. The website format will be changing and I have been adding new CAD library products. There will be many changes happening over the next month, so stop by the site when you can to see all the new products!
All my best,
Kevin
All my best,
Kevin
Thursday, January 1, 2009
The New Year...
This post is just to wish everyone out there a happy and prosperous new year!
Peace ~Kevin
Peace ~Kevin
Thursday, October 23, 2008
Lighting Plan / Electrical Wiring Tutorial
Have you ever seen AutoCAD drawings where someone has added arcing lines that continue from each other, but they are not tangent? (as in having nice smooth transitions from arc to arc). Placing those nice smooth wiring lines into your electrical plans is very fast and easy! We're going to use the ARC command to place the wires. If you remember, the ARC command and it's default prompting uses the 3 point ARC option. So we start all our wiring lines with a 3 point ARC as shown below:
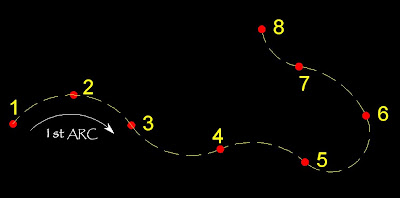 Let's practice first. Go to an open space in your drawing as shown above and enter the ARC command. I usually just type A and then spacebar, and that enters the ARC command very quickly. The prompt asks for the start point, pick point #1 anywhere in your drawing. Read the command prompt now... it asks for the second point. As you're draging from the first to the second point, it looks like a line is being drawn, ignore that and pick the second point. Once you pick the second point, what you're draging now looks like an ARC. The command prompt is now asking for the end point of the ARC, pick your 3rd point and the ARC is drawn, the command ends itself, and you have clear command prompt ready for the next step.
OK, here's the trick if you haven't done this before... if you press the spacebar or press the ENTER key, it repeats the ARC command, that's no big deal...but if you spacebar or ENTER again, it attaches the second arc to the end of your first arc!, AND the connection is TANGENT, as in a very smooth transition from one arc to the other! Now to draw the second ARC the prompting is different, look at your command prompt now... it asks only for the end point of the second arc, drag the ARC to a point that looks good and pick the end point, you're done with the second ARC. Just repeat as needed by double tapping the spacebar and picking points till you have all the arc lines that you need.
This technique is also very good for drawing curved landscape border lines!
Below is an example of running a curved wiring line from a switch to a fixture.
TIP: Remember to create a seperate layer for the wiring lines, and set a Hidden linetype to the layer. If you draw some arcs and don't see the hidden linetype, check your Ltscale setting. A good typical setting to start with in an architectural drawing is LTscale=24.
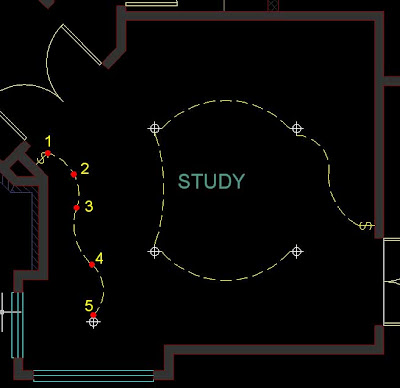 After picking point #4, the ARC command ends. Double tap the spacebar again repeating the ARC command, drag the ARC to the light fixture and pick point #5. You've just placed a perfectly smooth wiring line from switch to fixture.
TIP: If you don't like the way your wiring line looks, start over. Trying to edit the ARCs to make them look good is difficult.
Let's practice first. Go to an open space in your drawing as shown above and enter the ARC command. I usually just type A and then spacebar, and that enters the ARC command very quickly. The prompt asks for the start point, pick point #1 anywhere in your drawing. Read the command prompt now... it asks for the second point. As you're draging from the first to the second point, it looks like a line is being drawn, ignore that and pick the second point. Once you pick the second point, what you're draging now looks like an ARC. The command prompt is now asking for the end point of the ARC, pick your 3rd point and the ARC is drawn, the command ends itself, and you have clear command prompt ready for the next step.OK, here's the trick if you haven't done this before... if you press the spacebar or press the ENTER key, it repeats the ARC command, that's no big deal...but if you spacebar or ENTER again, it attaches the second arc to the end of your first arc!, AND the connection is TANGENT, as in a very smooth transition from one arc to the other! Now to draw the second ARC the prompting is different, look at your command prompt now... it asks only for the end point of the second arc, drag the ARC to a point that looks good and pick the end point, you're done with the second ARC. Just repeat as needed by double tapping the spacebar and picking points till you have all the arc lines that you need.
This technique is also very good for drawing curved landscape border lines!
Below is an example of running a curved wiring line from a switch to a fixture.
TIP: Remember to create a seperate layer for the wiring lines, and set a Hidden linetype to the layer. If you draw some arcs and don't see the hidden linetype, check your Ltscale setting. A good typical setting to start with in an architectural drawing is LTscale=24.
After you have placed a switch symbol, start your 3 point arc as shown above. The start point begins on the switch. Once you have completed the first ARC, double tap the space and you're right back in the ARC command ready to drag and place the second ARC. As shown above with point #4.
After picking point #4, the ARC command ends. Double tap the spacebar again repeating the ARC command, drag the ARC to the light fixture and pick point #5. You've just placed a perfectly smooth wiring line from switch to fixture.TIP: If you don't like the way your wiring line looks, start over. Trying to edit the ARCs to make them look good is difficult.
Below is an example of different ways to run wiring lines between fixtures. With a little practice, you can place them perfect the everytime! If you need a symbol library of Electrical Blocks, check out my web site address below. Don't spend any time drawing the symbols yourself, it's a massive waste of time!
http://www.archblocks.com/products.htm
If you have any questions, or comments about this AutoCAD lesson, send me a note at:
Good luck with all your projects!
~Kevin
Subscribe to:
Posts (Atom)


