
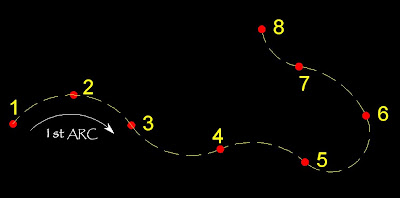
 Let's practice first. Go to an open space in your drawing as shown above and enter the ARC command. I usually just type A and then spacebar, and that enters the ARC command very quickly. The prompt asks for the start point, pick point #1 anywhere in your drawing. Read the command prompt now... it asks for the second point. As you're draging from the first to the second point, it looks like a line is being drawn, ignore that and pick the second point. Once you pick the second point, what you're draging now looks like an ARC. The command prompt is now asking for the end point of the ARC, pick your 3rd point and the ARC is drawn, the command ends itself, and you have clear command prompt ready for the next step.
OK, here's the trick if you haven't done this before... if you press the spacebar or press the ENTER key, it repeats the ARC command, that's no big deal...but if you spacebar or ENTER again, it attaches the second arc to the end of your first arc!, AND the connection is TANGENT, as in a very smooth transition from one arc to the other! Now to draw the second ARC the prompting is different, look at your command prompt now... it asks only for the end point of the second arc, drag the ARC to a point that looks good and pick the end point, you're done with the second ARC. Just repeat as needed by double tapping the spacebar and picking points till you have all the arc lines that you need.
This technique is also very good for drawing curved landscape border lines!
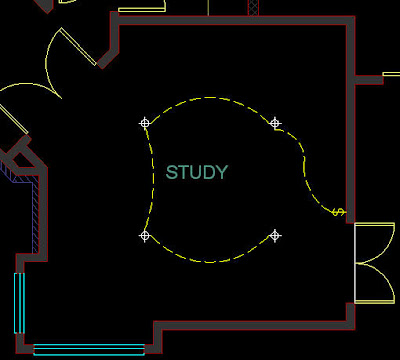
Below is an example of running a curved wiring line from a switch to a fixture.
TIP: Remember to create a seperate layer for the wiring lines, and set a Hidden linetype to the layer. If you draw some arcs and don't see the hidden linetype, check your Ltscale setting. A good typical setting to start with in an architectural drawing is LTscale=24.
After you have placed a switch symbol, start your 3 point arc as shown above. The start point begins on the switch. Once you have completed the first ARC, double tap the space and you're right back in the ARC command ready to drag and place the second ARC. As shown above with point #4.
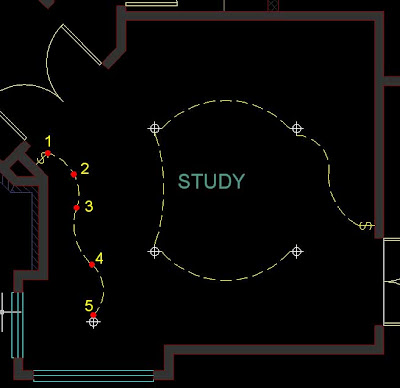 After picking point #4, the ARC command ends. Double tap the spacebar again repeating the ARC command, drag the ARC to the light fixture and pick point #5. You've just placed a perfectly smooth wiring line from switch to fixture.
TIP: If you don't like the way your wiring line looks, start over. Trying to edit the ARCs to make them look good is difficult.
Below is an example of different ways to run wiring lines between fixtures. With a little practice, you can place them perfect the everytime! If you need a symbol library of Electrical Blocks, check out my web site address below. Don't spend any time drawing the symbols yourself, it's a massive waste of time!
http://www.archblocks.com/products.htm
If you have any questions, or comments about this AutoCAD lesson, send me a note at:
Good luck with all your projects!
~Kevin


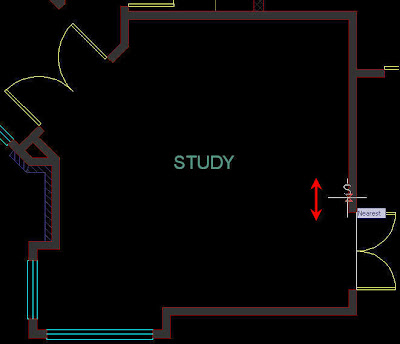 Next, you are prompted for Rotation. This is where Nearest works really well. Just drag your crosshairs along the wall, and pick anywhere (as long as the Nearest marker is showing). When you see your symbol rotated to where you want it, just pick, and the symbol is placed perfectly onto your wall.
 See ya next time!
 After that, you select what Products you want to install, AutoCAD 2009 was checked on by default.
 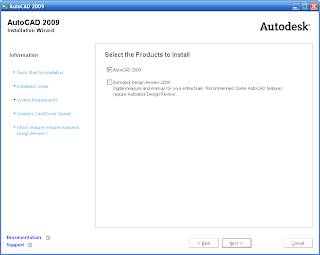 Next you need to Accept the License Agreement.
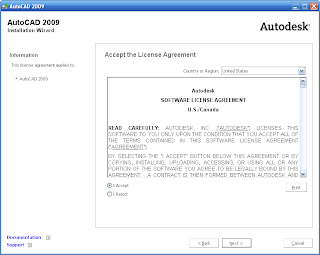 Next you have the option to Review, Configure, or Install. After looking over the default installation settings I noticed that the installing the Materials Library was checked off. So I selected Configure, so I could check it on .
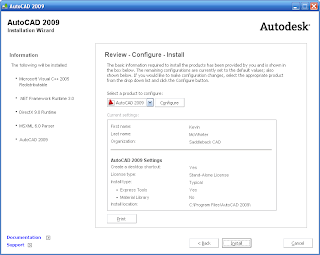 Next you select what license type you want to install, Stand Alone, or Network.
 Then you select the Installation Type, Typical is the default.
 The next dialog states that the Configuration is Complete.
 You are almost done! The Installtion Wizard now installs everything.
 After a few minutes the Installation Complete dialog appears.
 Once you pick Finish, you can choose to Restart your computer now, or later. The installation Wizard places this shortcut on the Desktop.
 Doubleclick the shortcut and your new AutoCAD 2009 comes to life. You will be asked if you want to migrate your settings from your older versions of AutoCAD that are on your computer. You are then asked if you would like to register now or later. I decided to register right then and it took less than a minute.
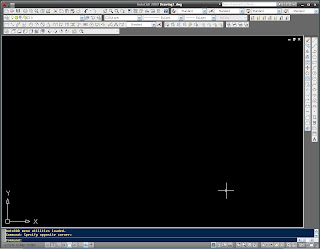


