
Sunday, March 30, 2008

Installing AutoCAD 2009

AutoCAD 2009 shipped last week to all the users that are on subcription with Autodesk. I installed mine today and wanted to share the installation experience with you all. I've been installing AutoCAD software for over 20 years now, and you always wonder how easy and trouble free it's really going to be. My installation went very smooth, and took approximately 20 minutes.
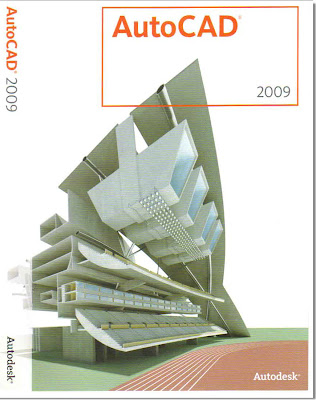
AutoCAD 2009 CD Box

I will give a step-by-step overview below of how the installation works, and what it looks like to install AutoCAD 2009.

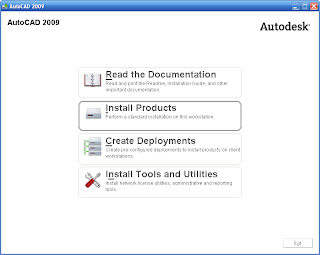
The first step after inserting the installation CD, is to select Install Products.
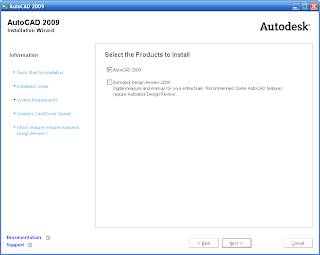
After that, you select what Products you want to install, AutoCAD 2009 was checked on by default.
Next you need to Accept the License Agreement.Next you have the option to Review, Configure, or Install. After looking over the default installation settings I noticed that the installing the Materials Library was checked off. So I selected Configure, so I could check it on .Next you select what license type you want to install, Stand Alone, or Network.

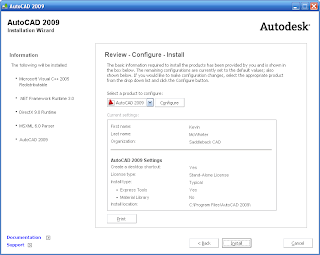
Then you select the Installation Type, Typical is the default.
The next dialog states that the Configuration is Complete.
You are almost done! The Installtion Wizard now installs everything.After a few minutes the Installation Complete dialog appears.
Once you pick Finish, you can choose to Restart your computer now, or later. The installation Wizard places this shortcut on the Desktop.

Doubleclick the shortcut and your new AutoCAD 2009 comes to life. You will be asked if you want to migrate your settings from your older versions of AutoCAD that are on your computer. You are then asked if you would like to register now or later. I decided to register right then and it took less than a minute.
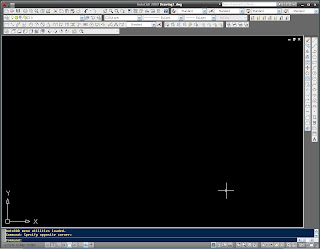
Viola! Your new AutoCAD 2009 is ready to be experienced!

Thursday, March 27, 2008

Weekend CAD Warrior!

How many of you out there use your AutoCAD for projects at home? Personally, I can't think of any better use for $3,000 software, and a $2,000 computer, than to design a $20 home project!

I love home remodel projects, and I've been a woodworker since I was 10 years old. So I'm starting an addition to my blog that shows how AutoCAD, or any CAD package, can save you time and improve your design projects at home.

The first project that I would like to present is one of the simplest ones I've done lately. I found two old outdoor chairs at a demolishion site in Oceanside California. I wanted to update the look and give them a new paint color. My first step was to decide what design I wanted to give the back and arms. I felt something similar to a loose interpetation of a adirondack chair would work fine. So I drew up a few options in AutoCAD as shown below.


I decided that I wanted the beveled back option. Drawing options in CAD is a great way to see different options and get cutting dimensions.


So here is the final result. The picture below shows one chair completed and one chair as I found them.


Not bad for for a $20 investment!


I will add my Weekend CAD Warrior column to my blog a couple times a month, so stay tuned for the next CAD home project.


~Peace to everyone~

Tuesday, February 19, 2008

AutoCAD 2009? Already?!

That's right! AutoCAD 2009 will be shipping soon. To see a couple of the features reviewed go to Donnie Gladfelter's "The CAD Geek Blog", at the URL address below:

http://thecadgeek.com/blog/

To see a complete list of the new features go Shaan Hurley's "Between the Lines" blog. You can also download the AutoCAD 2009 Preview Guide from his blog. His URL is:

http://autodesk.blogs.com/between_the_lines/2008/02/the-2009-produc.html

One of the new features I really like is the new "Ribbon" menu GUI. This is similar to the Dashboard menu in 2008 and 2007. There's great flexibility and customization in a very intuitive menu interface.

Peace - Kevin


Monday, February 18, 2008

AutoCAD Tip of the Week

If you use Paperspace in AutoCAD, there is a feature that has been available for the last few releases that is a big time saver! I use this feature all the time to Lock and Unlock Paperspace viewports. It is also a great way to change the scale factor of your viewports very quickly.


In the lower section of your screen menu at the very bottom you will find the Status bar. Typically, you use it to set your Ortho, Polar, and Osnap settings, etc. If you look a little further to the right there is a little Lock icon.


If you pick on this lock while you are in Paperspace viewport, it will Lock and Unlock the viewport view so you can zoom and pan around. This feature is so much faster than having to right-click the viewport border and then select Display Locked on the right-click menu.

Just to the right of the Lock icon is popdown menu that lets you select any scale factor you would like to set in the viewport. If you're a veteran of the earlier versions of AutoCAD, you will remember that you had to know and type in the zoom scale factor such as 1/48xp. That would give you a 1/4"=1'-0" scaled viewport. Is that old technique nuts, or what?!

So now you set your viewport scale and lock and unlock your viewports very quickly. Simple time saving features like this make upgrading your AutoCAD well with the money.

Have a great day! Kevin

Sunday, February 10, 2008

OC Metro Business Magazine Article

My new website ArchBlocks.com was featured in the OC Metro Business ~ E-Commerce section of the January 31st, 2008 edition. The OC Metro Business Magzine publishes articles on the current business events in Orange County, California.

The E-Commerce section features new, and innovative businesses that offer products over the internet.

This was an exciting event for my new website http://www.archblocks.com/ that offers upscale libraries to CAD designers.

If you would like to see the article follow the link below to:
http://www.ocmetro.com/NEW_SITE/metro013108/e_commerce.php
If you would like to view the libraries offered on the ArchBlocks.com Products page, please follow the link below:
http://www.archblocks.com/products.htm

Please stay tuned to this blog for tips and tricks, AutoCAD tutorials, and industry news.

Take care, Kevin

Wednesday, January 16, 2008

Happy New Year from ArchBlocks.com!

Welcome!
Thank you for stopping by. This is my first post for the exciting year of 2008. Please stay tuned to this blog in the coming year. I will be posting each month tips and tricks, tutorials, and industry news, and great links that I hope everyone will find informative.

I want this blog to be a great resource for new and experienced AutoCAD users.

Thursday, December 6, 2007

AutoCAD Door Blocks and Window Blocks

Door blocks, window blocks and cabinet blocks are a staple in almost every designer’s cad library. But if your using the same old architectural blocks to build your designs, chances are your auto cad drawings aren’t living up to their full potential.

Check out ArchBlock’s AutoCAD Doors & Windows Block Library Preview to see just a sample of the options you have for your cad drawings. We include great detail in our blocks, because we know that it’s the detail that makes your drawings stand out and really pop.

In addition to previewing the door blocks and cabinet blocks, you’ll see that you have the option of dressing up your design even further with great door hardware blocks, isometric cabinet hardware blocks and window treatment blocks. These features will give your auto cad drawing the professional and finished look your clients demand.

If you have any questions about our AutoCAD block library, Contact Us today!
